When Your Hayter's Height Adjustment Won't Stay Put
Date Released: 2 Mar 2026 Category: Blog
There's a particular type of garden-related irritation that comes from setting your Hayter to the perfect cutting height, starting your mowing, and then watching the deck gradually sink lower and lower until you're scalping the lawn. You stop, readjust the height, carry on, and the same thing happens again. By the end of the job, you've spent more time fiddling with the height lever than you have actually mowing.
If this sounds familiar, you're not alone. Height adjustment mechanisms take a real battering over the life of a lawn mower, and when they start to fail, it's one of those problems that can turn a pleasant mowing session into a teeth-grinding exercise in frustration. The good news is that most height adjustment issues are relatively straightforward to diagnose and fix, and you don't need to be a mechanical genius to sort them out.
Most Hayter height adjusters use a spring steel lever that's attached to each wheel. This lever has a small pin or detent on it that locks into notches cut into a metal quadrant. Each notch corresponds to a different cutting height, and when you move the lever, you're essentially clicking the pin from one notch to another. The spring tension in the steel holds the pin firmly in its notch, which is what's supposed to keep everything locked in place whilst you're mowing.
It's a beautifully simple system that works brilliantly when everything is in good condition. The problem is that these components are exposed to grass clippings, moisture, vibration, and constant use, which means they gradually wear out.
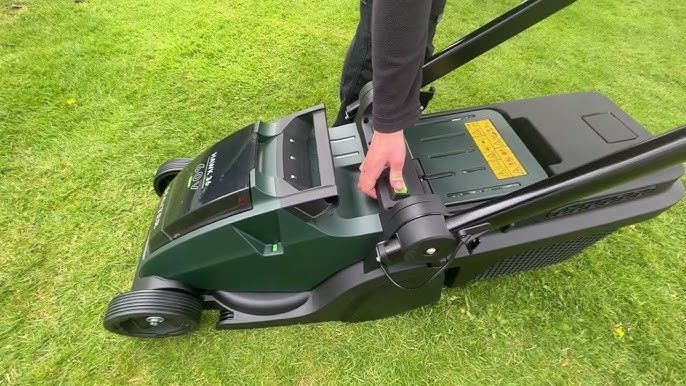
The most common issue is worn detent pins or springs. That little pin that locks into the notches is under constant pressure, and over time it can wear down until it no longer seats properly in the notch. Similarly, the spring that provides the tension can lose its springiness, which means it's not holding the pin firmly enough to resist the weight and vibration of the mower.
Bent or damaged adjustment levers are another frequent problem. The levers themselves are made from relatively thin spring steel, and if you've ever caught one on something whilst moving the mower around, or tried to force it when it was stuck, there's a good chance you've bent it slightly. Even a small bend can throw off the geometry enough that the pin doesn't engage properly with the notches.
The notches themselves can also wear out. After years of the pin clicking in and out of them, they can become rounded or shallow, particularly on the lower height settings that most people use most often. When this happens, the pin has less to grip onto and can slip out more easily.
Rust and debris are often contributing factors even when they're not the main problem. A bit of rust on the pivot point can make the whole mechanism stiff and awkward, whilst grass clippings wedged around the lever can prevent it from seating properly. These might seem like minor issues, but they can make an existing problem much worse.

Start with a thorough clean. Get underneath your Hayter with a stiff brush and really get stuck into the height adjustment mechanism on each wheel. Remove all the grass clippings, dirt, and general muck that's accumulated around the lever and quadrant. You'd be surprised how often a good clean is all that's needed to get things working smoothly again.
Once it's clean, have a close look at the mechanism whilst moving the lever through its range. Check that the pin is actually engaging with the notches and not just sitting on top of them. If it looks like it's close but not quite locking in properly, you might be able to carefully bend the lever very slightly to improve the engagement. Use gentle pressure and make small adjustments rather than trying to force anything.
Next, check all the bolts and nuts that hold the adjustment mechanism together. These can work loose over time, which introduces play into the system and prevents the pin from seating firmly. If you find any that are loose, tighten them snugly with a spanner. Just don't overtighten them or you'll make the adjustment stiff and awkward to use.
A light spray of WD-40 or similar penetrating oil on the pivot points can work wonders if rust is making things stiff. Give it a few minutes to work in, then work the lever back and forth a few times to distribute the lubricant. Wipe off any excess so you don't end up with a sticky mess that attracts dirt.
The good news is that height adjustment components are relatively inexpensive and straightforward to replace. Most consist of just the lever itself, the mounting bolt, and perhaps a washer or two. You don't need any special tools beyond a basic set of spanners, and the job typically takes about fifteen minutes per wheel once you know what you're doing.
When ordering replacement levers, you'll need your Hayter's model number from the identification plate. Height adjustment mechanisms are model-specific, so it's important to get the exact right part for your machine. The parts diagram for your model will show you exactly which lever you need and give you the part number to order.
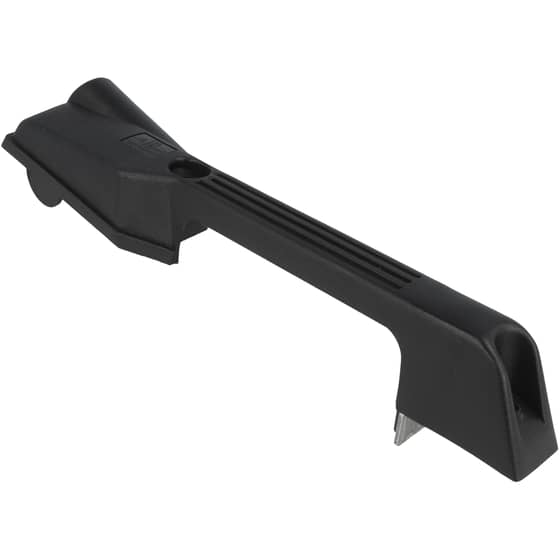
Start by making sure the mower is on a level surface and can't roll anywhere. For safety, disconnect the spark plug lead so there's no chance of the engine starting whilst you're working. You'll need to access the wheel you're working on, so it helps to tilt the mower slightly or prop it up on a block to take the weight off that wheel.
Remove the wheel by undoing the centre bolt. This usually requires a socket or spanner, and the bolt might be quite tight, so use a decent tool rather than a flimsy one that might slip. With the wheel off, you'll have clear access to the height adjustment lever.
The lever is typically held in place by a single bolt or nut. Undo this, being careful to note the order of any washers or spacers as you remove them. The old lever should then come away easily. If it's stuck with rust, a light tap with a hammer usually frees it up.
Fit the new lever in the reverse order, making sure all the washers go back where they came from. Tighten the mounting bolt firmly, but not so tight that the lever can't move freely through its range of adjustment. Refit the wheel, check that the height adjustment works smoothly through all positions, and you're done.
Make a point of cleaning around the height adjustment levers whenever you clean your mower after use. It only takes a minute to knock off the worst of the grass clippings, and it prevents them from building up and causing problems. A quick blast with a hose does the job nicely.
A light spray of lubricant on the pivot points at the start of each season will keep everything moving freely and help prevent rust. Just a quick squirt is all you need, you're not trying to drench it.
If you're storing your Hayter for any length of time, particularly over winter, try to keep it somewhere dry if at all possible. Constant exposure to damp conditions accelerates rust and deterioration of the metal components.
Similarly, if you've replaced the lever but you're still having problems, there might be an issue with the quadrant or the deck itself rather than just the adjustment mechanism. These are less common problems but can happen, particularly on older mowers, and they're best diagnosed by someone with experience.
Your Hayter's height adjustment might seem like a minor component, but it's crucial for getting that perfect cut. Whether you're after a bowling green finish or just trying to keep your lawn tidy, having a height adjustment you can trust makes all the difference. A bit of basic maintenance and the occasional replacement part when needed will keep everything working as it should, letting you focus on what matters, getting those perfect British stripes across your lawn.
If this sounds familiar, you're not alone. Height adjustment mechanisms take a real battering over the life of a lawn mower, and when they start to fail, it's one of those problems that can turn a pleasant mowing session into a teeth-grinding exercise in frustration. The good news is that most height adjustment issues are relatively straightforward to diagnose and fix, and you don't need to be a mechanical genius to sort them out.
How Height Adjustment Actually Works
Before we dive into what goes wrong, it helps to understand what's happening when you move that height adjustment lever. Although different Hayter models use slightly different mechanisms, the basic principle is remarkably similar across their range.Most Hayter height adjusters use a spring steel lever that's attached to each wheel. This lever has a small pin or detent on it that locks into notches cut into a metal quadrant. Each notch corresponds to a different cutting height, and when you move the lever, you're essentially clicking the pin from one notch to another. The spring tension in the steel holds the pin firmly in its notch, which is what's supposed to keep everything locked in place whilst you're mowing.
It's a beautifully simple system that works brilliantly when everything is in good condition. The problem is that these components are exposed to grass clippings, moisture, vibration, and constant use, which means they gradually wear out.
Why Your Height Adjustment Keeps Slipping
When your height adjustment won't stay where you set it, there are several possible culprits. Understanding which one is causing your problem will help you work out the best solution.The most common issue is worn detent pins or springs. That little pin that locks into the notches is under constant pressure, and over time it can wear down until it no longer seats properly in the notch. Similarly, the spring that provides the tension can lose its springiness, which means it's not holding the pin firmly enough to resist the weight and vibration of the mower.
Bent or damaged adjustment levers are another frequent problem. The levers themselves are made from relatively thin spring steel, and if you've ever caught one on something whilst moving the mower around, or tried to force it when it was stuck, there's a good chance you've bent it slightly. Even a small bend can throw off the geometry enough that the pin doesn't engage properly with the notches.
The notches themselves can also wear out. After years of the pin clicking in and out of them, they can become rounded or shallow, particularly on the lower height settings that most people use most often. When this happens, the pin has less to grip onto and can slip out more easily.
Rust and debris are often contributing factors even when they're not the main problem. A bit of rust on the pivot point can make the whole mechanism stiff and awkward, whilst grass clippings wedged around the lever can prevent it from seating properly. These might seem like minor issues, but they can make an existing problem much worse.
Quick Fixes Worth Trying First
Before you start thinking about replacement parts, there are a few simple fixes that are worth attempting. They don't cost anything and can often solve the problem, particularly if the mechanism is just dirty or slightly misaligned rather than actually worn out.Start with a thorough clean. Get underneath your Hayter with a stiff brush and really get stuck into the height adjustment mechanism on each wheel. Remove all the grass clippings, dirt, and general muck that's accumulated around the lever and quadrant. You'd be surprised how often a good clean is all that's needed to get things working smoothly again.
Once it's clean, have a close look at the mechanism whilst moving the lever through its range. Check that the pin is actually engaging with the notches and not just sitting on top of them. If it looks like it's close but not quite locking in properly, you might be able to carefully bend the lever very slightly to improve the engagement. Use gentle pressure and make small adjustments rather than trying to force anything.
Next, check all the bolts and nuts that hold the adjustment mechanism together. These can work loose over time, which introduces play into the system and prevents the pin from seating firmly. If you find any that are loose, tighten them snugly with a spanner. Just don't overtighten them or you'll make the adjustment stiff and awkward to use.
A light spray of WD-40 or similar penetrating oil on the pivot points can work wonders if rust is making things stiff. Give it a few minutes to work in, then work the lever back and forth a few times to distribute the lubricant. Wipe off any excess so you don't end up with a sticky mess that attracts dirt.
When Replacement Becomes Necessary
Sometimes, though, the mechanism is simply worn out and no amount of cleaning or adjustment will bring it back to proper working order. If you've tried the quick fixes and the height adjustment still won't hold, it's time to think about replacement parts.The good news is that height adjustment components are relatively inexpensive and straightforward to replace. Most consist of just the lever itself, the mounting bolt, and perhaps a washer or two. You don't need any special tools beyond a basic set of spanners, and the job typically takes about fifteen minutes per wheel once you know what you're doing.
When ordering replacement levers, you'll need your Hayter's model number from the identification plate. Height adjustment mechanisms are model-specific, so it's important to get the exact right part for your machine. The parts diagram for your model will show you exactly which lever you need and give you the part number to order.
Fitting a New Height Adjustment Lever
If you're comfortable with basic DIY, fitting a new lever is well within your capabilities. The exact process varies slightly between models, but the general approach is the same.Start by making sure the mower is on a level surface and can't roll anywhere. For safety, disconnect the spark plug lead so there's no chance of the engine starting whilst you're working. You'll need to access the wheel you're working on, so it helps to tilt the mower slightly or prop it up on a block to take the weight off that wheel.
Remove the wheel by undoing the centre bolt. This usually requires a socket or spanner, and the bolt might be quite tight, so use a decent tool rather than a flimsy one that might slip. With the wheel off, you'll have clear access to the height adjustment lever.
The lever is typically held in place by a single bolt or nut. Undo this, being careful to note the order of any washers or spacers as you remove them. The old lever should then come away easily. If it's stuck with rust, a light tap with a hammer usually frees it up.
Fit the new lever in the reverse order, making sure all the washers go back where they came from. Tighten the mounting bolt firmly, but not so tight that the lever can't move freely through its range of adjustment. Refit the wheel, check that the height adjustment works smoothly through all positions, and you're done.
Keeping Everything Working Smoothly
Prevention is always better than cure, and there are a few simple maintenance habits that'll keep your height adjustment working properly for longer.Make a point of cleaning around the height adjustment levers whenever you clean your mower after use. It only takes a minute to knock off the worst of the grass clippings, and it prevents them from building up and causing problems. A quick blast with a hose does the job nicely.
A light spray of lubricant on the pivot points at the start of each season will keep everything moving freely and help prevent rust. Just a quick squirt is all you need, you're not trying to drench it.
If you're storing your Hayter for any length of time, particularly over winter, try to keep it somewhere dry if at all possible. Constant exposure to damp conditions accelerates rust and deterioration of the metal components.
When to Get Help
Most height adjustment problems are DIY-friendly, but there are times when it makes sense to get professional help. If you're not confident working with tools, or if the mechanism seems more complex than you're comfortable tackling, any good lawn mower repair shop will be able to sort it out for you quickly and relatively cheaply.Similarly, if you've replaced the lever but you're still having problems, there might be an issue with the quadrant or the deck itself rather than just the adjustment mechanism. These are less common problems but can happen, particularly on older mowers, and they're best diagnosed by someone with experience.
Your Hayter's height adjustment might seem like a minor component, but it's crucial for getting that perfect cut. Whether you're after a bowling green finish or just trying to keep your lawn tidy, having a height adjustment you can trust makes all the difference. A bit of basic maintenance and the occasional replacement part when needed will keep everything working as it should, letting you focus on what matters, getting those perfect British stripes across your lawn.