Why Won't My Hayter Start? Instant Diagnostic Flowchart for Engine & Starter Problems
Date Released: 10 Nov 2025 Category: Blog
The frustration of a silent Hayter Harrier is a feeling every gardener knows. These machines are built to last, so when yours refuses to start, the issue is almost always a fault in one of the three core elements every petrol engine needs: Fuel, Spark, or Squeeze (Compression).
This guide offers a complete, easy-to-read walkthrough, from the quickest checks to the most detailed fixes, helping you diagnose the exact problem and get back to a perfectly striped lawn.
This rubber cap connects the wire to the spark plug. Pulling it off completely breaks the electrical circuit, making it impossible for the engine to fire, even if the cord is accidentally pulled. Do this before any inspection or repair.
The Safety Handle and Key
Your Hayter has a safety lever on the handlebar, called the Operator Presence Control (OPC). You must hold this lever down to allow the engine to run. If the lever cable is loose or the lever is not fully pressed, the engine’s safety switch will prevent ignition. If you have an electric-start model, ensure the key is firmly turned to the "ON" position.
 Checking the Engine Oil
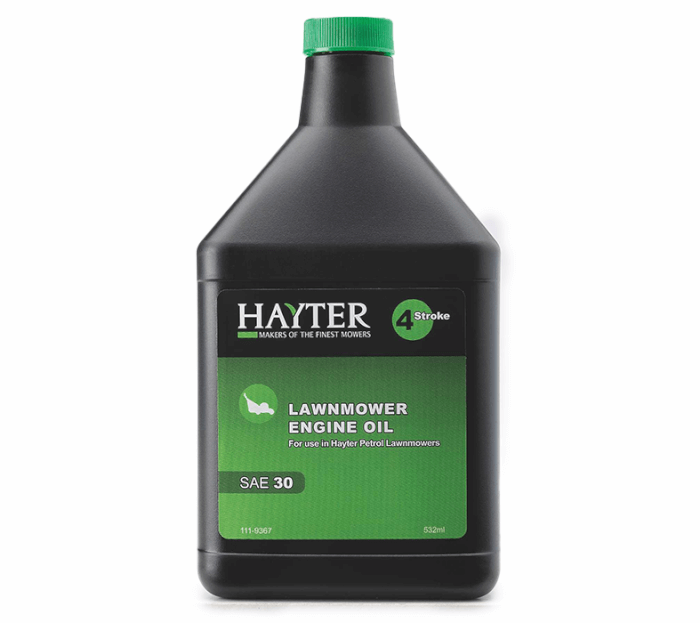
Like a car, your lawnmower has a sensor that stops the engine from starting if the oil level is too low. This feature prevents severe, costly damage. Pull out the dipstick, wipe it clean, and check the level. If it's below the low mark, top it up immediately with the correct oil type (as specified in your manual).
Is the Engine Stuck?
Try pulling the cord slowly. If the cord feels very stiff, or the engine makes a single, solid clunk instead of spinning, the engine may be mechanically stuck. First, with the spark plug boot removed, tilt the mower onto its side (air filter facing up) and inspect the cutting blade. Grass clippings or a jammed stick can sometimes prevent the blade from turning, which stops the engine. Clear any debris. If the cord still won't budge, you may have a deeper mechanical issue requiring a mechanic.
Electric Start Power (If Applicable)
If you have an electric start and only hear a rapid clicking sound when you turn the key, the battery is the issue. Check that the terminal connections are clean and tight. If they are, the battery is likely flat and needs charging with a dedicated small-engine charger. If it still won't hold a charge, it needs replacing.
The Fresh Fuel Test
Standard unleaded petrol begins to degrade after about 30 days. As it breaks down, it leaves behind a sticky, varnish-like residue that gums up the super-tiny holes (jets) inside the carburettor.
If your mower sat for more than a month without being treated with stabilizer or run dry, the fuel is suspect. The solution is non-negotiable: Drain the entire tank and refill it with brand new petrol. You cannot fix a bad batch of fuel by topping it up. Going forward, always add a high-quality fuel stabilizer to your petrol, even if you plan to use it within a month.
The Spark Plug Wet Test
Once you have fresh fuel, we need to know if it's actually reaching the engine. Remove the spark plug and look closely at the tip.
If the plug is completely DRY: This confirms the engine is starving for fuel. The lines or the carburettor are blocked. Skip ahead to the Carburettor Check section. If the plug is WET and smells strongly of fuel: The engine is either flooded (too much fuel) or the spark is too weak to ignite the mix. Wipe the plug completely dry, clear the excess fuel by pulling the start cord a few times with the plug out, and then reinstall the dry plug. Try starting without using the choke or primer.
 Even with the perfect fuel mix, you need a strong spark to ignite it.
Replacing the Spark Plug
The spark plug creates the tiny explosion that starts the engine. If it’s old, fouled (caked with oil or carbon), or damaged, it won't fire reliably. If the plug looks black, oily, or old, the quickest and easiest fix is simply to install a brand new one. Ensure the new plug is correctly gapped (the small distance between the two metal points), as specified in your owner’s manual.
Testing the Spark Strength
To confirm the electrical system is working, we perform a spark test. Reconnect the plug boot to the spark plug. Hold the metal threaded base of the plug firmly against a clean, unpainted metal surface on the engine block. Pull the starter cord. You must see a bright, crisp, blue-white flash of light jump across the gap.
The Thumb-over-Hole Test
This simple test checks for compression loss. With the spark plug removed, place your thumb tightly over the spark plug hole. Pull the starter cord briskly. You should feel a strong burst of air try to push your thumb off the hole.
If the air puff is weak, the engine is leaking air, which suggests a significant
mechanical failure, such as worn piston rings or stuck valves. These are internal problems that require specialized tools and skills to fix. At this point, you should take your Hayter to a professional service center.
The Starter Fluid Trick
Before dismantling anything, try forcing the blockage out. Remove the air filter and the air filter housing to expose the throat of the carburettor. Then, spray a very short burst of carburettor cleaner or starter fluid directly into the exposed opening. Immediately try to start the engine.
If the engine runs briefly (even for a second) and then dies, you’ve confirmed that all major components are working; the engine just can’t pull fuel through the blocked jets on its own.
 If the starting fluid didn't work, you need to clean the internal parts. The Float Bowl is the small cup at the bottom of the carburettor where the main fuel supply sits.
Drain all the fuel from the tank.
Locate the float bowl, which is usually held onto the bottom of the carburettor body by a single bolt. Remove the bowl and place a tray underneath to catch any spilled fuel. Carefully unscrew the bolt and remove the bowl. The main jet is often located within this bolt or the center column it threads into.
The main jet is a small brass fitting with a pinhole opening. This is where old fuel varnish sits. Use a thin strand of wire (from a wire brush) or specialized carburettor cleaning wire to gently clear the hole. Do not scratch or widen the opening.
Then, put the jet and bowl back on, ensuring the gasket is correctly seated. Refill with fresh, stabilized fuel.
This procedure, while a little advanced, is often the ultimate solution to a non-starting Hayter and will save you the cost of a full service. By systematically checking fuel, spark, and squeeze, you’ve conquered the most common small-engine failure.
This guide offers a complete, easy-to-read walkthrough, from the quickest checks to the most detailed fixes, helping you diagnose the exact problem and get back to a perfectly striped lawn.
1. Non-Negotiable Safety First
Before we touch anything inside the machine, you must ensure safety. The single most important step when inspecting the blade or working near the engine is to remove the spark plug boot.This rubber cap connects the wire to the spark plug. Pulling it off completely breaks the electrical circuit, making it impossible for the engine to fire, even if the cord is accidentally pulled. Do this before any inspection or repair.
2. The Simple Starting Check-Up
Don't jump straight to the engine’s guts. Many non-starting issues are caused by safety features or simple oversight.The Safety Handle and Key
Your Hayter has a safety lever on the handlebar, called the Operator Presence Control (OPC). You must hold this lever down to allow the engine to run. If the lever cable is loose or the lever is not fully pressed, the engine’s safety switch will prevent ignition. If you have an electric-start model, ensure the key is firmly turned to the "ON" position.
Like a car, your lawnmower has a sensor that stops the engine from starting if the oil level is too low. This feature prevents severe, costly damage. Pull out the dipstick, wipe it clean, and check the level. If it's below the low mark, top it up immediately with the correct oil type (as specified in your manual).
Is the Engine Stuck?
Try pulling the cord slowly. If the cord feels very stiff, or the engine makes a single, solid clunk instead of spinning, the engine may be mechanically stuck. First, with the spark plug boot removed, tilt the mower onto its side (air filter facing up) and inspect the cutting blade. Grass clippings or a jammed stick can sometimes prevent the blade from turning, which stops the engine. Clear any debris. If the cord still won't budge, you may have a deeper mechanical issue requiring a mechanic.
Electric Start Power (If Applicable)
If you have an electric start and only hear a rapid clicking sound when you turn the key, the battery is the issue. Check that the terminal connections are clean and tight. If they are, the battery is likely flat and needs charging with a dedicated small-engine charger. If it still won't hold a charge, it needs replacing.
3. The Fuel System: The Top Cause of Failure
Petrol problems account for the vast majority of small engine failures. The main culprits are often old fuel or blockages caused by that old fuel.The Fresh Fuel Test
Standard unleaded petrol begins to degrade after about 30 days. As it breaks down, it leaves behind a sticky, varnish-like residue that gums up the super-tiny holes (jets) inside the carburettor.
If your mower sat for more than a month without being treated with stabilizer or run dry, the fuel is suspect. The solution is non-negotiable: Drain the entire tank and refill it with brand new petrol. You cannot fix a bad batch of fuel by topping it up. Going forward, always add a high-quality fuel stabilizer to your petrol, even if you plan to use it within a month.
The Spark Plug Wet Test
Once you have fresh fuel, we need to know if it's actually reaching the engine. Remove the spark plug and look closely at the tip.
4. The Spark System: Firing the Engine
Replacing the Spark Plug
The spark plug creates the tiny explosion that starts the engine. If it’s old, fouled (caked with oil or carbon), or damaged, it won't fire reliably. If the plug looks black, oily, or old, the quickest and easiest fix is simply to install a brand new one. Ensure the new plug is correctly gapped (the small distance between the two metal points), as specified in your owner’s manual.
Testing the Spark Strength
To confirm the electrical system is working, we perform a spark test. Reconnect the plug boot to the spark plug. Hold the metal threaded base of the plug firmly against a clean, unpainted metal surface on the engine block. Pull the starter cord. You must see a bright, crisp, blue-white flash of light jump across the gap.
- If the Spark is Weak (yellow/orange) or Missing:
5. The Squeeze System: Testing Compression
If you have fresh Fuel and a strong Spark, but the engine still refuses to run, it must be losing its Squeeze (Compression). This means the engine cannot build enough internal pressure to ignite the fuel/air mix.The Thumb-over-Hole Test
This simple test checks for compression loss. With the spark plug removed, place your thumb tightly over the spark plug hole. Pull the starter cord briskly. You should feel a strong burst of air try to push your thumb off the hole.
If the air puff is weak, the engine is leaking air, which suggests a significant
mechanical failure, such as worn piston rings or stuck valves. These are internal problems that require specialized tools and skills to fix. At this point, you should take your Hayter to a professional service center.
6. The Final Diagnosis: Fixing the Carburettor
If your Hayter has a strong Spark and good Squeeze, the problem has been narrowed down to a blocked fuel pathway. Even if the plug was slightly wet, the tiny idle jet inside the carburettor—which is critical for starting—is almost certainly clogged with old fuel varnish.The Starter Fluid Trick
Before dismantling anything, try forcing the blockage out. Remove the air filter and the air filter housing to expose the throat of the carburettor. Then, spray a very short burst of carburettor cleaner or starter fluid directly into the exposed opening. Immediately try to start the engine.
If the engine runs briefly (even for a second) and then dies, you’ve confirmed that all major components are working; the engine just can’t pull fuel through the blocked jets on its own.
Cleaning the Carburettor Float Bowl
Drain all the fuel from the tank.
Locate the float bowl, which is usually held onto the bottom of the carburettor body by a single bolt. Remove the bowl and place a tray underneath to catch any spilled fuel. Carefully unscrew the bolt and remove the bowl. The main jet is often located within this bolt or the center column it threads into.
The main jet is a small brass fitting with a pinhole opening. This is where old fuel varnish sits. Use a thin strand of wire (from a wire brush) or specialized carburettor cleaning wire to gently clear the hole. Do not scratch or widen the opening.
Then, put the jet and bowl back on, ensuring the gasket is correctly seated. Refill with fresh, stabilized fuel.
This procedure, while a little advanced, is often the ultimate solution to a non-starting Hayter and will save you the cost of a full service. By systematically checking fuel, spark, and squeeze, you’ve conquered the most common small-engine failure.