Your Hayter's Clutch Cable Just Gave Up Mid-Stripe: The 10-Minute Cable Swap That Saves Your Weekend
Date Released: 1 Jan 2026 Category: Blog
You're halfway through creating those perfect lawn stripes, feeling rather pleased with yourself, when suddenly your Hayter decides it's had enough of this whole "self-propelled" business. The engine's still running beautifully, the blades are spinning away, but the mower's stopped pulling itself forward. Now you're pushing what feels like a small car across your garden, and your weekend lawn care plans are rapidly turning into an upper body workout you definitely didn't sign up for.
Before you start mentally calculating the cost of a repair shop visit or wondering if your Hayter's days are numbered, let me share some genuinely good news. Nine times out of ten, when a Hayter's self-propel suddenly packs in, it's just a clutch cable that's stretched, frayed, or snapped. The even better news? It's one of the easiest fixes you can do yourself, costs less than twenty quid, and takes about ten minutes once you know what you're doing.
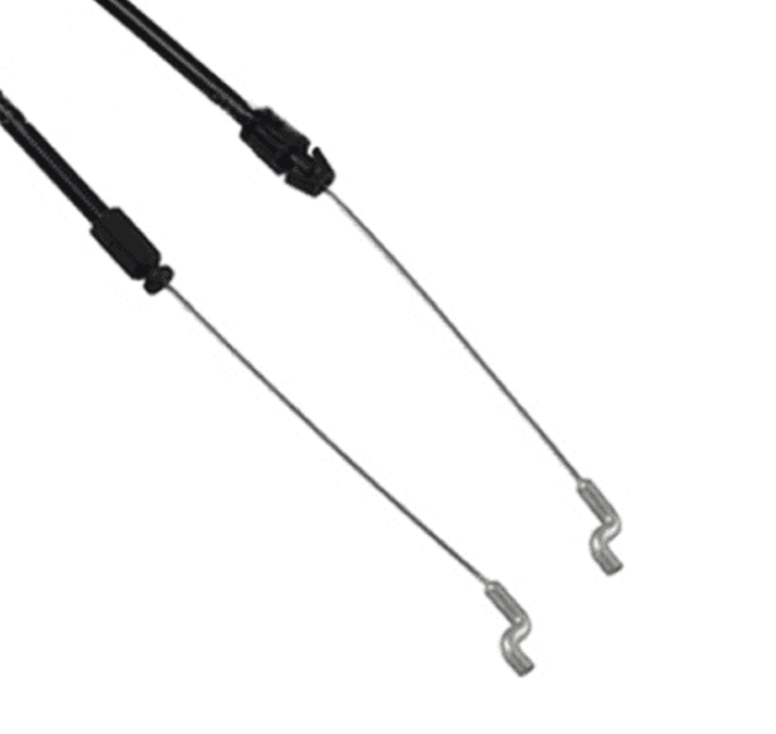
Over time, that cable has a tough life. It's constantly being pulled and released, getting damp from British weather, and working hard every time you mow. Eventually, the cable stretches, the metal strands fray at the ends, or it snaps completely.
The frustrating bit? Everything else on your mower might be perfect. The engine runs beautifully, the blades are sharp, the gearbox is fine. But without that cable doing its job, you're stuck pushing the whole thing yourself.
Sometimes you'll hear it snap with a little "ping" sound, and suddenly you're pushing. Game over for that cable.
Most Hayter clutch cables last three to seven years, depending on use and storage. It's a wear item, like brake pads, designed to be replaced when needed.
First up, you'll disconnect the old cable from the bail bar mechanism on the handle. There's usually a simple clip or a small bolt holding it in place. Once you've popped that off, the cable's free at the top end. If you're worried about forgetting how it all goes back together, take a quick photo with your phone before you start taking things apart. Next, follow the cable down to where it connects near the rear wheels. It'll be held on with another clip or a small bracket. Undo that, and the old cable slides out of its housing. If it's snapped, you might find it's already come loose at one end, which makes life even easier. Now for the new cable. Feed it through the same route as the old one (this is where that photo comes in handy). Connect it at both ends, making sure everything's seated properly and the cable runs smoothly without any tight bends or kinks. The last step is adjusting the tension. Most Hayter cables have a simple adjustment near the handle. You want just enough tension so the drive engages smoothly when you pull the bail bar, but not so tight that there's constant pressure on the system even when the bar's released.
Give it a test run around the garden. If the self-propel kicks in nicely and your Hayter's gliding across the lawn again like it's supposed to, congratulations. You've just saved yourself a repair shop visit and learned a new skill.
Tool-wise, you're looking at a couple of adjustable spanners or a basic socket set. Nothing exotic. If you've got a toolkit in the shed with the usual bits and pieces, you've already got what you need.

Plus, there's something satisfying about fixing your own equipment. Next time the cable starts feeling soft, you'll spot it early and swap it before it fails mid-mow.
But this is one of the simplest fixes on a Hayter. For less than the cost of a takeaway and ten minutes of work, you'll have your self-propel working perfectly again. No special skills required, just a straightforward cable swap that anyone can manage.
Your Hayter will be back to doing the hard work for you, which is exactly what you paid for when you bought a self-propelled mower in the first place.
Before you start mentally calculating the cost of a repair shop visit or wondering if your Hayter's days are numbered, let me share some genuinely good news. Nine times out of ten, when a Hayter's self-propel suddenly packs in, it's just a clutch cable that's stretched, frayed, or snapped. The even better news? It's one of the easiest fixes you can do yourself, costs less than twenty quid, and takes about ten minutes once you know what you're doing.
What's Actually Gone Wrong?
When you squeeze that bail bar on the handle, you're pulling a cable that runs all the way down to the transmission. When it's pulled tight, it engages the drive system. Think of it like a bicycle brake cable, except instead of stopping wheels, it's making them go.Over time, that cable has a tough life. It's constantly being pulled and released, getting damp from British weather, and working hard every time you mow. Eventually, the cable stretches, the metal strands fray at the ends, or it snaps completely.
The frustrating bit? Everything else on your mower might be perfect. The engine runs beautifully, the blades are sharp, the gearbox is fine. But without that cable doing its job, you're stuck pushing the whole thing yourself.
The Warning Signs
Looking back, there were probably clues. The bail bar might have felt soft for a few weeks, needing to be pulled harder than usual. Maybe the self-propel would work, then let go for a second, then catch again. That was the cable gradually giving up, one strand at a time.Sometimes you'll hear it snap with a little "ping" sound, and suddenly you're pushing. Game over for that cable.
Why It Happens
This isn't a design flaw. Hayters work hard, and that self-propel system gets used constantly. The cable's under tension the entire time you're mowing, and with a bit of British moisture getting in, plus a couple of winters of storage, eventually it wears out.Most Hayter clutch cables last three to seven years, depending on use and storage. It's a wear item, like brake pads, designed to be replaced when needed.
The Actual Fix (It's Easier Than You Think)
Replacing a clutch cable genuinely isn't complicated. You don't need to be mechanically minded, you don't need special tools, and you definitely don't need to take it to a repair shop. Here's what you're actually doing:Give it a test run around the garden. If the self-propel kicks in nicely and your Hayter's gliding across the lawn again like it's supposed to, congratulations. You've just saved yourself a repair shop visit and learned a new skill.
What You'll Actually Need
A replacement clutch cable for a Hayter runs between £12 and £25 depending on which model you've got. The earlier Harriers use a slightly different cable than the newer ones, so you'll want to double-check your model number before ordering. You'll find that on the ID plate, usually tucked under the grass collector or on the back of the deck.Tool-wise, you're looking at a couple of adjustable spanners or a basic socket set. Nothing exotic. If you've got a toolkit in the shed with the usual bits and pieces, you've already got what you need.
Should You Take It to a Shop?
You could. A local repair place will charge £40-70 for this job, parts and labour. That's not unreasonable, but when the cable costs under £25 and the job takes ten minutes, you're paying someone £30-50 to do something you could manage yourself.Plus, there's something satisfying about fixing your own equipment. Next time the cable starts feeling soft, you'll spot it early and swap it before it fails mid-mow.
The Bottom Line
A snapped clutch cable feels like a disaster when it happens. You're standing in the middle of your lawn, suddenly pushing a heavy machine, wondering if expensive problems are starting.But this is one of the simplest fixes on a Hayter. For less than the cost of a takeaway and ten minutes of work, you'll have your self-propel working perfectly again. No special skills required, just a straightforward cable swap that anyone can manage.
Your Hayter will be back to doing the hard work for you, which is exactly what you paid for when you bought a self-propelled mower in the first place.